

Still Life Painting Journal
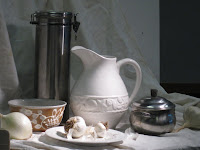
Today in class we began our first painting. Ms. Aycock had arranged a still life consisting of a white pitcher, tall silver container, a bowl with designs around it, a saucer with 2 garlic bulbs, a bowl shaped silver container with a lid and handles, a large white onion, and a large single garlic bulb all sitting on a cart with a white cloth draped over cardboard screen to form a backdrop.
We applied Gesso to the canvas before beginning to paint. We wrapped butcher paper around pieces of cardboard and used these for pallets. We each put a dab brown sienna paint onto our cardboard pallets. Ms. Aycock showed us how to pour the mineral spirits from a jar into smalls cans for individual use. The rule is to pour all of the mineral spirits from the jar without tipping it up thus the paint sediment in the bottom of the jar will not be dislodged. We each received a view finder in the form of two L-shaped pieces of cardboard.
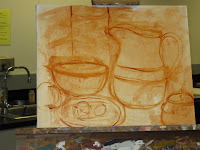
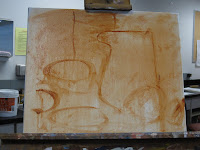
STEP 1 Using the largest brush and lots of mineral spirits I applied the underpainting to the canvas. I think that I used too much paint and not enough mineral spirits which I plan to remedy on the next canvas. I had applied too much Gesso and my canvas did not dry completely before I began to paint resulting in several sticky areas.
Ms Aycock demonstrated how to hold the paint brush at the back and how the brush should be flat against the canvas. She reminded us that unevenness of the paint made a nice background. She also said that the under painting would show through, giving the painting a warm glow.
STEP 2 using our view finders we each began to experiment with composition and had to make a decision about whether to use portrait or landscape shape for our paintings. It took me a while to decide on the composition and focal point of my attempt. Ms. Aycock stated that we were to have at least one reflective object in our composition and that three of the objects should "leave" the canvas. To demonstrate how to determine focal points, Ms. Aycock drew a rectangle on the white board and divided it into 9 equal parts. She drew a circle where each of the vertical and horizontal lines met stating that these were the focal points of a painting and to use this trick to plan the painting.
STEP 3 After Ms. Aycock demonstrated the technique; I raised my canvas to eye level and began to make an abstract drawing of the objects. Holding the view finder up to the still life display I began to roughly mark the objects on my canvas. Ms. Aycock demonstrated the "connect the dots" strategy for checking the balance of objects. I tried this and it helped me correct the shape of the bowl which was too round at first.
STEP 4 The last thing we did today was the line drawing. Using my smallest paint brush and I drew the outside lines of the objects. Ms. Aycock demonstrated how to measure openings in objects, as well as height and width by holding a paint brush or pencil at arm’s length. This technique was helpful in checking for mistakes in object shapes. She recommended that we back away from our paintings and by looking at them from afar we would be able to distinguish problems.
Ms. Aycock checked our work after each step. She provided suggestions for how to improve the shape of the bowl on my canvas showing me how to measure where the two parts of the bowl top met. I applied the technique, made the changes, and could immediately see the improvement.
Carla Goble
No comments:
Post a Comment